.rockinrfile-bd60589efab1d3c2a8651053129345a244ac549cd80af2c3f3e7aec1b110af99.png)
How to Spread Gravel Like a Pro with a Dump Trailer Rental
If you’re working on a landscaping project, driveway repair, or path construction, spreading gravel efficiently can save you time and effort. A dump trailer is one of the best tools for the job, and renting one makes it accessible for DIY enthusiasts and contractors alike. This guide will walk you through tailgating gravel with a dump trailer, tailored for various climates and needs.
Why Choose a Dump Trailer for Gravel?
Gravel is a go-to material for driveways, landscaping, and erosion control. With a dump trailer, you can haul and spread it in one trip, cutting down on backbreaking labor. Renting a dump trailer is budget-friendly compared to hiring a crew or buying equipment, and with the right technique, you’ll get a polished, professional result.
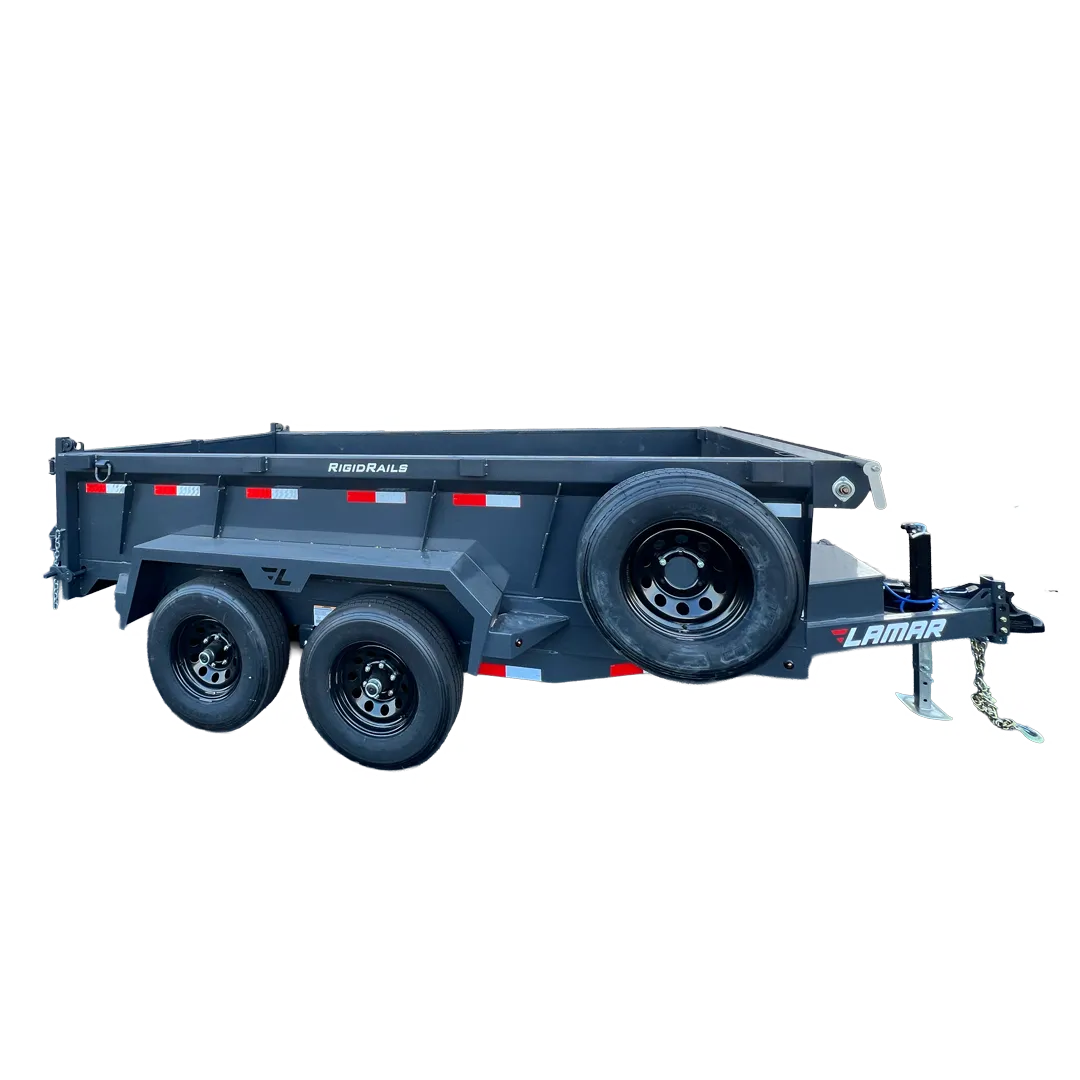
Step 1: Pick the Perfect Dump Trailer
Start by renting a trailer designed for gravel spreading. Here’s what to look for:
- Spreader Gate: Opt for a trailer with an adjustable spreader gate, like ours.
- Payload Capacity: A 10,000–14,000-lb GVWR trailer handles 2–6 tons of gravel—perfect for most projects.
- Low Profile: Makes it easier to see the spread, especially in tight spaces.
Many rental companies offer trailers with handy extras like wireless remotes, which are great for solo jobs.
Step 2: Load and Prep Your Gravel
Once you’ve got your rental, load it up properly:
- Even Distribution: Spread gravel evenly in the bed to prevent tipping.
- Gate Setup: Adjust the tailgate opening (try 3-4 inches to start) based on your gravel type—pea gravel for landscaping or ¾-inch minus for driveways.
- Dry Conditions: Dry gravel flows smoothly, but dry air can kick up more dust. Lightly dampen the gravel or wear a mask to keep dust in check.
Pro Tip: Buy gravel from a nearby supplier to cut transportation costs.
Step 3: Plan Your Spreading Route
A little prep goes a long way:
- Clear the Area: Remove debris for a level base.
- Map It Out: Begin at one end of your driveway or path and work outward.
- Layer Thickness: Aim for 2-4 inches to stabilize the gravel.
Step 4: Spread Gravel with ConfidenceHere’s how to tailgate like a pro:
- Raise the Bed: Lift the trailer bed slightly until gravel presses against the gate. Don’t over-lift—safety first.
- Open the Gate: Set it to your desired width. A remote makes this easy from the driver’s seat.
- Drive Slowly: Move at 2-5 mph, adjusting speed for even thickness. If dust picks up, lightly dampen the gravel.
- Monitor: Check mirrors or use a spotter to watch the spread. Low-profile trailers give you a better view.
If gravel clumps, pause to widen the gate or break it up with a shovel.
Step 5: Smooth It Out
After spreading, lower the bed and check your work. Grab a rake or rent a small tractor to even out lumps. For narrow paths, use a divider in the bed to offset the gate and direct the flow.
Extra Tips for Success
- Practice Safely: Test your skills in a legal, safe spot—like your own yard or a designated area—before the big job.
- Control Dust: In dry weather, dampen gravel slightly or wear a mask to avoid breathing dust.
- Stay Safe: Avoid overhead lines and never exceed the trailer’s weight limit.
Why Rent a Dump Trailer?
Owning a trailer might not make sense for a single project. Renting gives you flexibility—pick the size and features you need without maintenance hassles. Look for daily or weekly rates to keep costs low.
Wrap-Up
Spreading gravel with a dump trailer is a skill that pays off. With the right rental, a solid plan, and a little practice, you can upgrade your property in no time. Ready to dive in? Reserve our dump trailer now!